
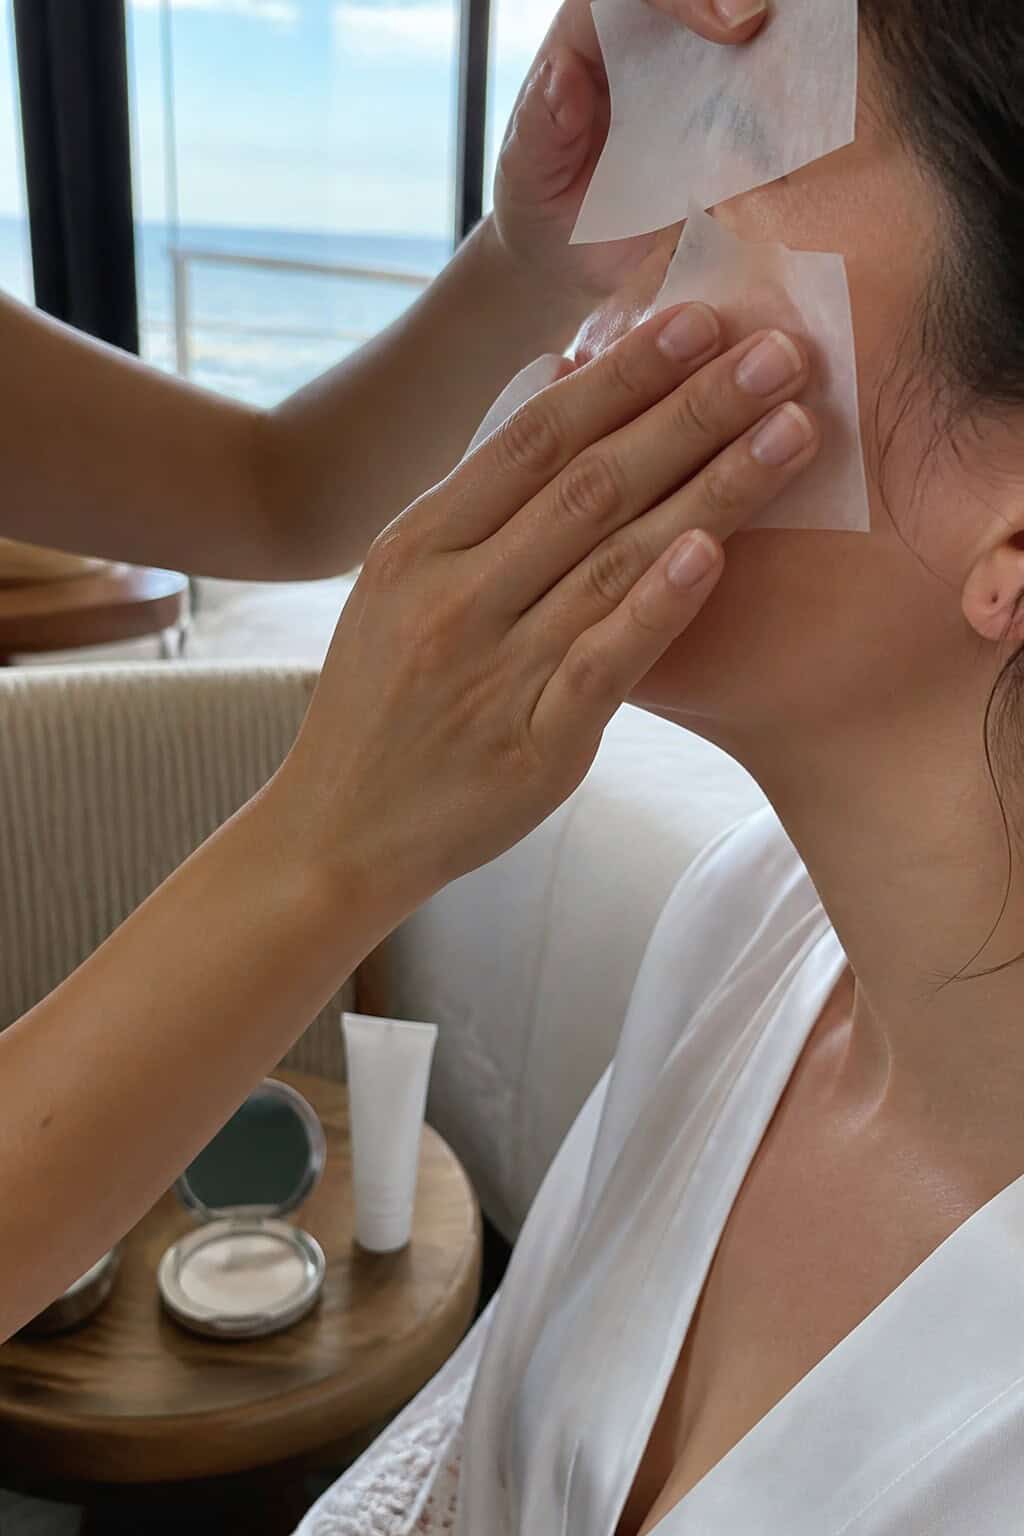
Your beach wedding makeup has to survive sunscreen, sweat, tears, wind, and bright reflected light. The answer is not a thicker layer of everything. It is thin, compatible layers and a touch-up kit built around the products already on your face.

Get Your Wedding Free at Sandals
Sandals covers the whole wedding — planner, ceremony, private cocktail reception, two-tier cake, bouquet and boutonniere — free when you stay 7 nights in a Club or Butler suite. Plus $200 toward photos and $200 toward video.
Start with skin care and sun protection you have tested together. A beautiful base can separate within minutes if the sunscreen, primer, and foundation do not agree.
Resort brides: Sandals’ free wedding package covers the ceremony, not makeup, so book the on-site spa early or bring your own kit. See the current Sandals offer or read our breakdown of the fine print.
Test the full face in heat and daylight
A salon trial tells you how the makeup looks in a chair. You also need to know how it wears.
Schedule the trial with enough daylight left for outdoor photos. Wear the makeup for several hours. Spend a reasonable amount of time outside in conditions similar to the wedding, without risking a burn or heat illness.
Check the face at these points:
- Immediately after application
- In indirect natural light
- In direct sunlight
- After 30 minutes outdoors
- After eating and drinking
- Under phone flash in a dim room
- At the end of the day
Take close photos without filters. Look for separation around the nose, creasing under the eyes, sunscreen pilling, a pale cast in flash, blush that disappears, and lipstick bleeding.
Do not introduce a new facial, peel, retinoid, self-tanner, or aggressive exfoliation in the wedding week. Irritated skin is harder to cover and may react to products that normally work.
Start with sunscreen, then give it time to set
Sunscreen still matters on a wedding day. Choose a broad-spectrum product with an SPF appropriate for you and use it according to its label. The U.S. Food and Drug Administration notes that broad-spectrum SPF 15 or higher is only one part of sun protection, which also includes clothing and shade.
Makeup containing SPF may not be applied heavily or evenly enough to replace a dedicated sunscreen. Use a product you have tested under the exact primer and foundation planned for the wedding.
Apply sunscreen to clean, moisturized skin and let each layer settle before the next. If the products roll into tiny flakes, that is pilling. The formulas may be incompatible, the layers may be too heavy, or you may be rubbing too much.
Test the sunscreen on your neck, chest, ears, and shoulders too. A foundation-matched face next to red or differently toned skin is difficult to correct in photographs.
Understand SPF flashback without skipping protection
“Flashback” is the pale or gray cast that appears in flash photos even when makeup looks normal in person. Certain mineral sunscreen filters, especially zinc oxide and titanium dioxide, can contribute by scattering light. Some powders and complexion products can also reflect flash.
That does not mean you should avoid sunscreen or assume every mineral formula will photograph badly. Modern formulas vary, skin tone matters, application amount matters, and the camera’s flash angle changes the result.
The practical solution is a test:
- Apply the exact sunscreen, primer, base, concealer, and powder.
- Wait for the products to settle.
- Take phone and camera photos in daylight.
- Take direct-flash photos in a dim room.
- Check the center of the face, under-eyes, hairline, neck, and chest.
Do not solve flashback by applying less sunscreen than the label directs. Find a sunscreen and makeup combination that tests well, or work with your artist and a skin-care professional to find a suitable option.
Use thin layers for a durable base
Heavy foundation can trap heat, crease, and separate. Start with skin preparation, then use a small amount of long-wearing foundation where you need it. Add concealer only to specific areas.
Press and stipple rather than repeatedly dragging products across sunscreen. Let liquids set before adding powders. A damp sponge can remove excess, but constant blending may lift the protection underneath.
Choose coverage based on your preference, not an assumption that wedding makeup must hide real skin. Freckles, texture, and pores are normal. A base that still looks like skin in close daylight often ages better through the day than an opaque mask.
If you have oily skin, target oil control at the forehead, nose, and chin instead of drying the whole face. If your skin is dry, avoid piling powder over areas that already flake.
Powder only where it earns its place
Powder sets cream products and controls shine, but too much can look dry in sunlight and reflective under flash. Some silica-heavy powders are notorious for appearing white when heavily applied and hit by direct flash.
Use a small amount with a puff or brush, press it where makeup moves, and sweep away excess. Test the exact powder during the flash check.
Later, blot sweat or oil before adding more powder. Powdering over moisture creates texture and can darken patches. A clean tissue, blotting paper, or soft cloth is a better first step.
Choose cheek color for bright outdoor light
Strong daylight can wash out subtle blush and bronzer in photographs, while too much shimmer can emphasize texture and sweat.
Layering a cream blush under a compatible powder blush can improve wear. Keep color placement slightly higher if that suits your face, since heat naturally adds redness around the center of the face.
Use highlighter selectively. The high points of the cheeks may already catch intense sunlight, and the forehead, nose, and upper lip will develop natural shine. A satin finish often photographs more predictably than visible glitter.
Bring the neckline of your beach wedding dress to the makeup conversation. A strapless or open dress may require careful blending on the neck and chest, but body makeup must be transfer-resistant and tested against the fabric.
Waterproof the eyes strategically
Waterproof mascara and water-resistant liner are useful, but the whole eye look needs compatible layers.
Free Wedding Planning Checklist
Stay organized from engagement to "I do" — get our comprehensive checklist covering every task, deadline, and detail.
Prime the lids if they become oily. Use thin liner that follows your eye shape instead of a large wing that wind and tears can disturb. Tubing mascara can be an option for some people because it removes differently from traditional waterproof formulas, but test it before the wedding.
For false lashes, choose a length and band weight you can tolerate. Wind can lift a poorly secured outer corner. Individual clusters may fail less dramatically than one heavy strip, although technique and adhesive matter more than the category.
If you wear contacts, tell the artist and insert them before eye makeup if that is what your eye-care professional recommends. Bring rewetting drops approved for your lenses and a backup pair.
Never try a new lash adhesive on the wedding day. Patch-test cosmetic adhesives according to their instructions and avoid any product that has caused irritation.
Keep brows groomed, not shellacked
Brow gel can hold hairs through humidity, but too much product may flake or look shiny. Fill only where you want definition, then use a clear or tinted hold product you have tested.
Schedule waxing, threading, tinting, or lamination with enough time for redness or a reaction to settle. Follow the provider’s care directions. Do not combine several new brow services right before travel.
A spoolie in the touch-up kit can reset hairs without adding another layer.
Pick a lip you can maintain
Long-wear liquid lipstick survives drinks but can feel dry, crack, or become difficult to repair. Gloss is comfortable and catches windblown hair. Traditional lipstick transfers but is easy to reapply.
Choose the tradeoff you prefer. Test the lip with the drinks and foods likely at the reception. Use a liner if it improves the edge, and bring the exact products.
For a low-maintenance approach, try a lip stain with a coordinating balm. Blot between thin layers. Avoid applying a new formula over the remains of a different one after the ceremony, because textures can clump.
Ask the photographer or a trusted person to check teeth before close portraits.
Schedule makeup around heat, photos, and hair
Work backward from the time you must be dressed and ready for portraits or transport. Ask the hair and makeup team how they want to overlap services.
The getting-ready room should be cool, bright, and uncluttered. Natural light helps with color, but direct sun on the makeup chair adds heat. Keep balcony doors closed if humidity is high.
Build in time after makeup for:
- A daylight and flash check
- Dressing without pulling clothing over the face
- Lip application after eating
- Body sunscreen settling
- Final powder only where needed
- Photographs and travel to the ceremony
The beach wedding checklist can help you place beauty preparation in the larger ceremony schedule.
Ask the artist the right questions
A beach-experienced artist should be able to explain their process without promising “sweat-proof” skin. People sweat. Products resist it to different degrees.
Ask:
- Which sunscreen should I test under your kit?
- Will you use my sunscreen or provide one?
- How do you prep my skin type in humidity?
- Which products are water-resistant?
- How do you test for flashback?
- Do you provide a touch-up kit?
- Can you match the face, neck, and chest without staining clothing?
- How much time do you need for each person?
- Will you stay for touch-ups, and what does that service include?
Tell the artist about allergies, sensitivities, prescription skin treatments, recent procedures, and products you cannot use. They need accurate information, not a surprise on the wedding morning.
Build a touch-up kit that matches the face
Do not fill the kit with random travel minis. Ask the artist for samples or exact product names and shades.
Include:
- Blotting papers or a clean soft cloth
- Small pressed powder and applicator, if used in the look
- Concealer for precise repair
- Lip liner, color, and balm
- Cotton swabs
- Clean mini sponge
- Lash adhesive if you are wearing false lashes
- Tissues
- Small mirror
- Facial mist only if it was tested with the makeup
Keep sunscreen for body reapplication according to its label. Reapplying facial sunscreen over a full face is difficult, so prioritize shade, a hat before the ceremony, and a tested reapplication method discussed with your artist or skin-care professional.
Give the kit to one trusted person. They should blot, check teeth, hand you the lip color, and stop. A group of friends each adding powder creates a different problem.
Handle sweat by pressing, not wiping
Sweat is normal. Press a clean tissue or blotting paper onto moisture. Do not wipe across foundation, blush, or sunscreen. Let the skin cool before repairing makeup.
Keep cold water available and wait in shade or air conditioning. A small fan can help before you reach the ceremony, but point it away from false lashes and contact lenses.
For tears, press a tissue at the inner or outer corner and let it absorb the tear before it runs. Rubbing under the eye will move concealer and mascara together.
Put comfort ahead of a perfect finish
No makeup stays exactly the same through hours of heat, smiling, eating, and dancing. The goal is predictable wear and easy repair.
Test sunscreen with the complete base. Photograph it with direct flash. Use thin layers, set only where needed, and carry the actual lip and powder products. Then build shade, water, and cooling time into the day.
Your skin will still have texture and your face may shine by dinner. That is not a makeup failure. It is what a real person looks like at a beach wedding.