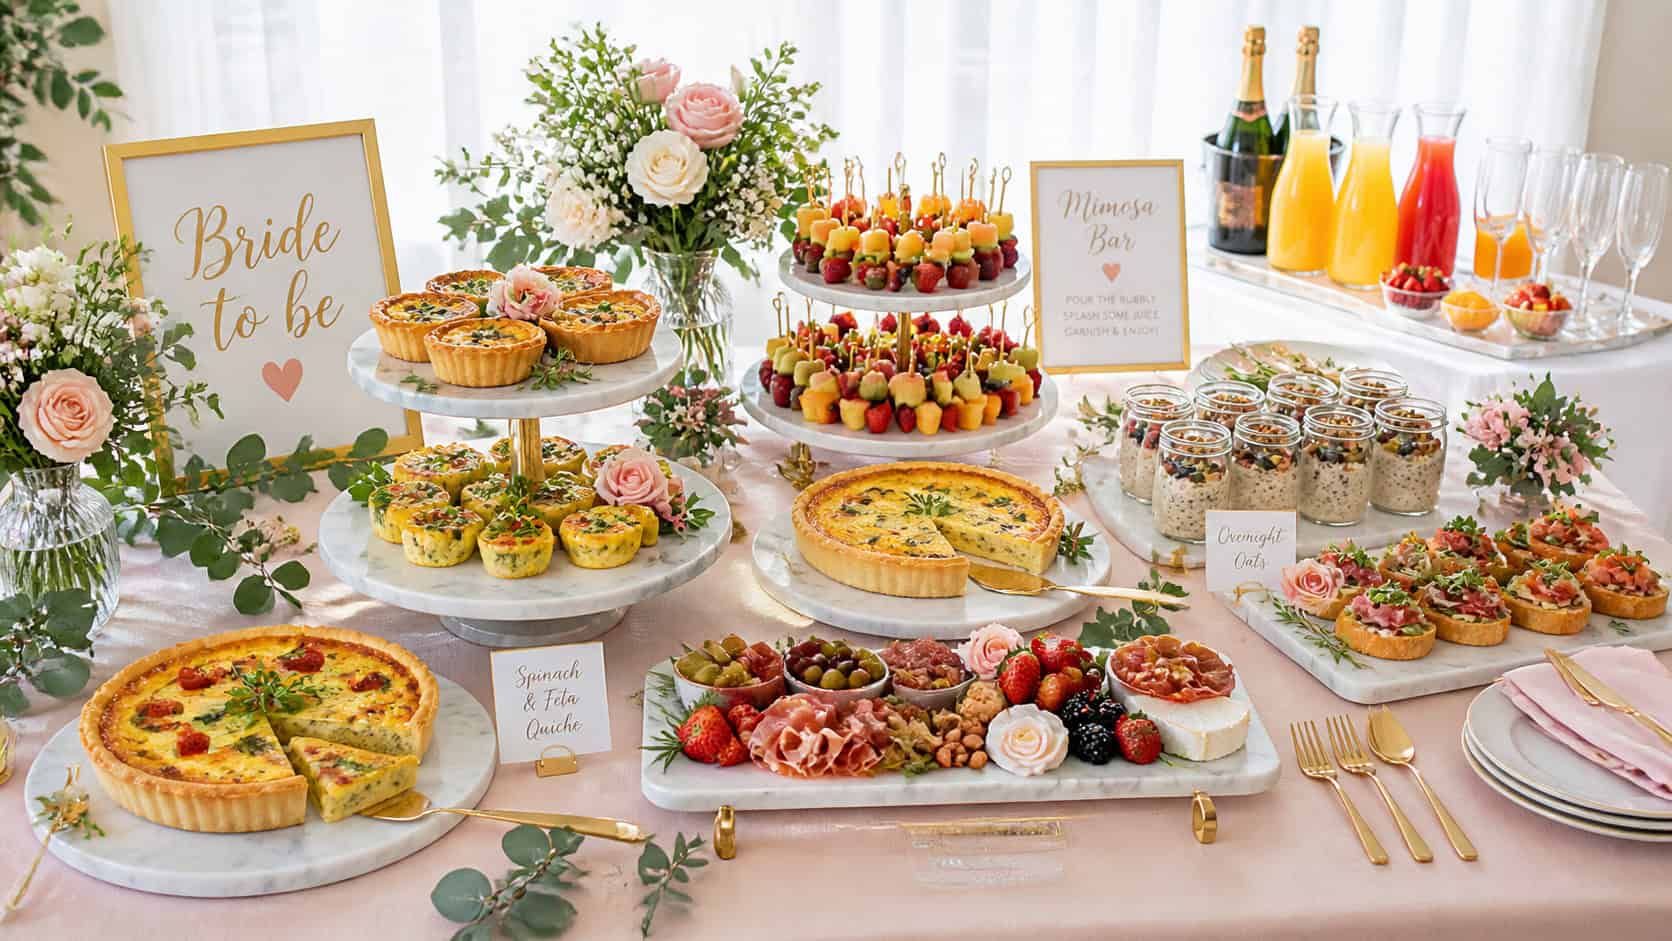
I’ve seen more than one bridal shower brunch buffet wilt, weep, or stiffen by mid-morning, and that exact moment tells you everything about menu choices. The core problem is food that changes texture or temperature after 11 AM. Guests mill about, linger over mimosas, circle back for seconds — and if your dishes can’t handle that, you’ll be quietly salvaging plates before the gift-opening even starts.

Sandals Will Throw Your Wedding for Free
Stay 7 nights in a Club or Butler suite and Sandals covers the wedding: a personal planner, the ceremony, a private cocktail reception, a two-tier cake, your bouquet and boutonniere, plus $200 toward photos and $200 toward video. No venue hunt, no vendor juggling.
These nine recipes hold up past 11 AM by staying moist, keeping structure, or tolerating room temperature gracefully. Each one comes with a specific serving tip so you’re not improvising under pressure when the second wave of guests arrives.
1) Savory Smoked Salmon and Dill Strata
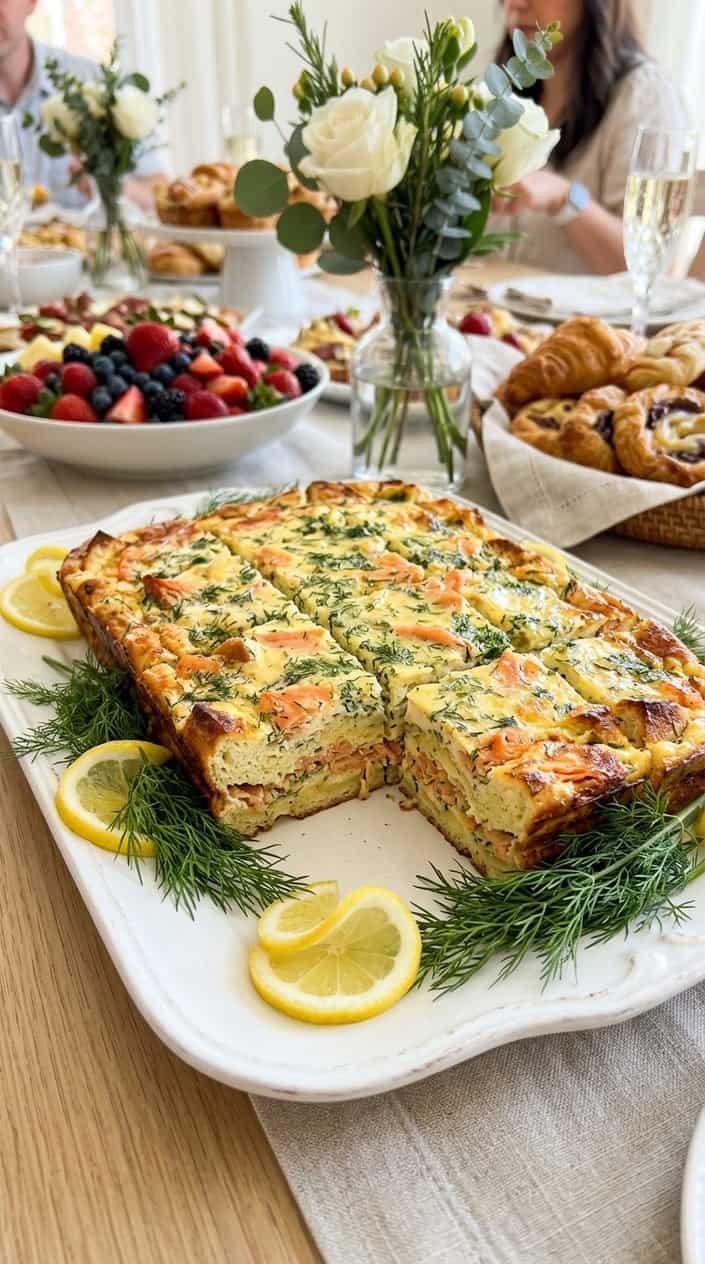
This strata is one of my most-used anchor dishes for late-morning brunches. The custard-soaked bread and cream cheese create a structure that stays moist and sliceable well after the oven is off. It doesn’t dry at the edges the way a standard egg casserole tends to, which matters when you’re running a two-hour service window.
Serve it warm or at room temperature. A scatter of fresh dill added right before guests arrive brightens each slice and signals “just made” even if it came out of the oven forty minutes ago.
Ingredients
- 8 cups cubed sourdough bread (about 1 lb)
- 8 oz smoked salmon, flaked
- 6 large eggs
- 2 cups whole milk
- 1 cup cream cheese, softened
- 1 cup shredded Gruyère or Swiss
- 2 tbsp chopped fresh dill
- 1 tsp Dijon mustard
- 1 tsp salt
- 1/2 tsp black pepper
Instructions
- Grease a 9×13 baking dish and spread half the bread cubes evenly.
- Scatter smoked salmon and half the shredded cheese over the bread.
- Layer remaining bread, cream cheese dollops, and remaining cheese.
- Whisk eggs, milk, Dijon, salt, pepper, and chopped dill until smooth.
- Pour custard slowly over the layers, pressing bread gently to soak.
- Cover and refrigerate at least 2 hours or overnight.
- Remove from fridge 30 minutes before baking and preheat oven to 350°F.
- Bake covered 30 minutes, uncover and bake 20–25 minutes more until set and lightly browned.
- Let rest 10 minutes, then slice and garnish with extra dill.
Prep time: 20 minutes (plus chilling) | Cook time: 50–55 minutes | Servings: 8–10
Assemble this strata the night before and refrigerate it unbaked. The longer soak actually improves the texture — the bread absorbs the custard more evenly, giving you cleaner slices on the buffet. Pull it from the fridge 30 minutes before it goes in the oven so it bakes through without a cold center.
2) Mini Frittatas with Caramelized Onion, Gruyère, and Thyme

Individual portions solve one of the bigger buffet problems: guests hesitating over a shared casserole dish. These frittatas are grab-and-go, which keeps the line moving.
The eggs set firmly, the cheese holds moisture without making the frittatas soggy, and the caramelized onions are stable at room temperature. A tiered platter does more work than a flat tray here — it gives visual height and keeps things from looking crowded as the quantity dwindles.
Ingredients
- 12 large eggs
- 1/2 cup half-and-half
- 2 large onions, thinly sliced
- 2 tablespoons unsalted butter
- 1 1/2 cups grated Gruyère
- 2 teaspoons fresh thyme leaves
- 1 teaspoon kosher salt
- 1/2 teaspoon black pepper
- Nonstick spray or 2 tablespoons melted butter for tins
Instructions
- Cook onions in butter over medium-low heat, stirring often, until deeply golden, about 30 minutes. Cool slightly.
- Whisk eggs with half-and-half, salt, and pepper until blended.
- Fold in caramelized onions, Gruyère, and thyme.
- Preheat oven to 350°F and grease two 12-cup mini muffin tins.
- Pour mixture to about 3/4 full in each cup and bake 15–18 minutes, until puffed and set.
- Cool 10 minutes in tins, then transfer to a wire rack to reach room temperature.
Prep time: 10 minutes active (30 minutes with onions) | Cook time: 18 minutes | Servings: 24

Aybloom Nonstick 24-Cup Mini Muffin Pan
Check Price3) Cold Sesame Soba Noodle Salad with Cucumber, Edamame, and Scallions
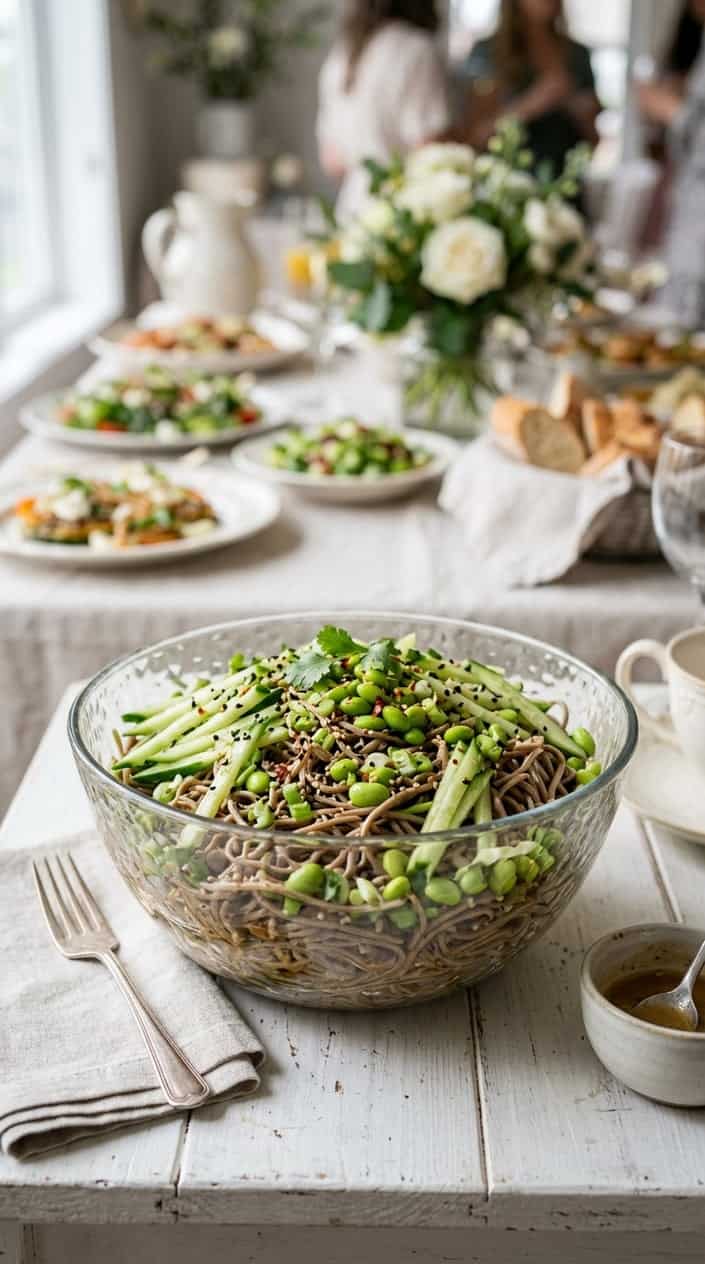
Cold dishes earn their place on a buffet when they genuinely stay cold and cohesive — not when they slowly warm into a limp pile. This soba salad does the first thing right. Buckwheat noodles stay firm longer than wheat-based pastas, cucumber holds its crunch, and edamame is basically indestructible at room temperature.
Use a wide, shallow platter rather than a deep bowl. It distributes the dressing more evenly and means guests are spooning from the top rather than dragging noodles up from a tangled center.
Ingredients
- 200 g (7 oz) soba noodles
- 1 cup shelled edamame, cooked and cooled
- 1 medium cucumber, julienned
- 3 scallions, thinly sliced
- 3 tbsp soy sauce
- 2 tbsp rice vinegar
- 1 tbsp toasted sesame oil
- 1 tbsp honey or maple syrup
- 1 tsp grated fresh ginger
- 1 tbsp toasted sesame seeds
Instructions
- Cook soba according to package until al dente, drain, and rinse under cold water until cool.
- Whisk soy sauce, rice vinegar, sesame oil, honey, and grated ginger in a bowl.
- Toss noodles with dressing, then fold in edamame, cucumber, and scallions.
- Rest 10 minutes in the fridge so flavors meld, then scatter sesame seeds before serving.
Prep time: 15 minutes | Cook time: 6 minutes | Servings: 6
“The difference between a buffet that looks good at 11 AM and one that looks good at 12:30 PM comes down to about three ingredient decisions per dish.”
4) Buttermilk Biscuits with Overnight-Simmered Sausage Gravy
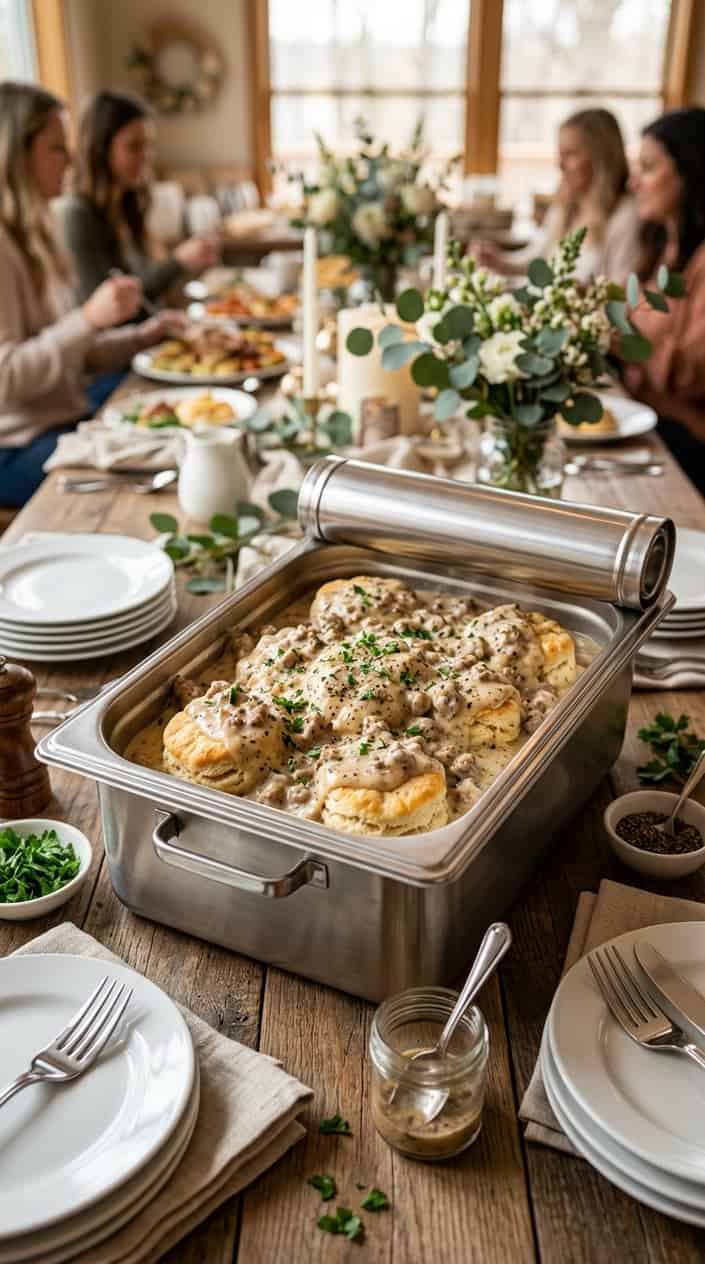
Biscuits and gravy have no business being as reliable as they are on a brunch buffet, and yet here we are. The biscuits stay flaky because cold butter creates steam pockets during the quick high-heat bake. The gravy thickens overnight in the fridge, so it retains its consistency on the serving line rather than separating or becoming watery after the first hour.
Keep the gravy in an insulated carrier and wrap biscuits in clean tea towels between batches. This is also one of the few buffet dishes where refilling is genuinely easy — biscuits bake in under 15 minutes, so a second batch can come out of the oven mid-party if you need it.
Ingredients
- 2 cups all-purpose flour
- 1 tbsp baking powder
- 1 tsp baking soda
- 1 tsp salt
- 6 tbsp cold unsalted butter, cubed
- 3/4 cup buttermilk
- 1 lb breakfast sausage
- 1/4 cup all-purpose flour (for gravy)
- 3 cups whole milk
- 1 tsp kosher salt
- 1/2 tsp black pepper
Instructions
- Preheat oven to 450°F. Toss flour, baking powder, baking soda, and salt in a bowl.
- Cut in cold butter until pea-sized crumbs form. Stir in buttermilk until just combined. Do not overmix.
- Pat dough 1-inch thick, cut with a 2.5-inch cutter, and bake 12–14 minutes until golden.
- Brown the sausage in a heavy pot, breaking it up. Sprinkle 1/4 cup flour and cook 1 minute.
- Stir in milk gradually, bring to a simmer, and cook until thick. Season with salt and pepper.
- Cool the gravy and refrigerate overnight. Reheat gently in an insulated carrier before service.
Prep time: 20 minutes | Cook time: 40 minutes | Servings: 8

MIAOJIE Insulated Casserole Carrier Bag
Check Price5) Heirloom Tomato and Burrata Crostini with Balsamic Reduction
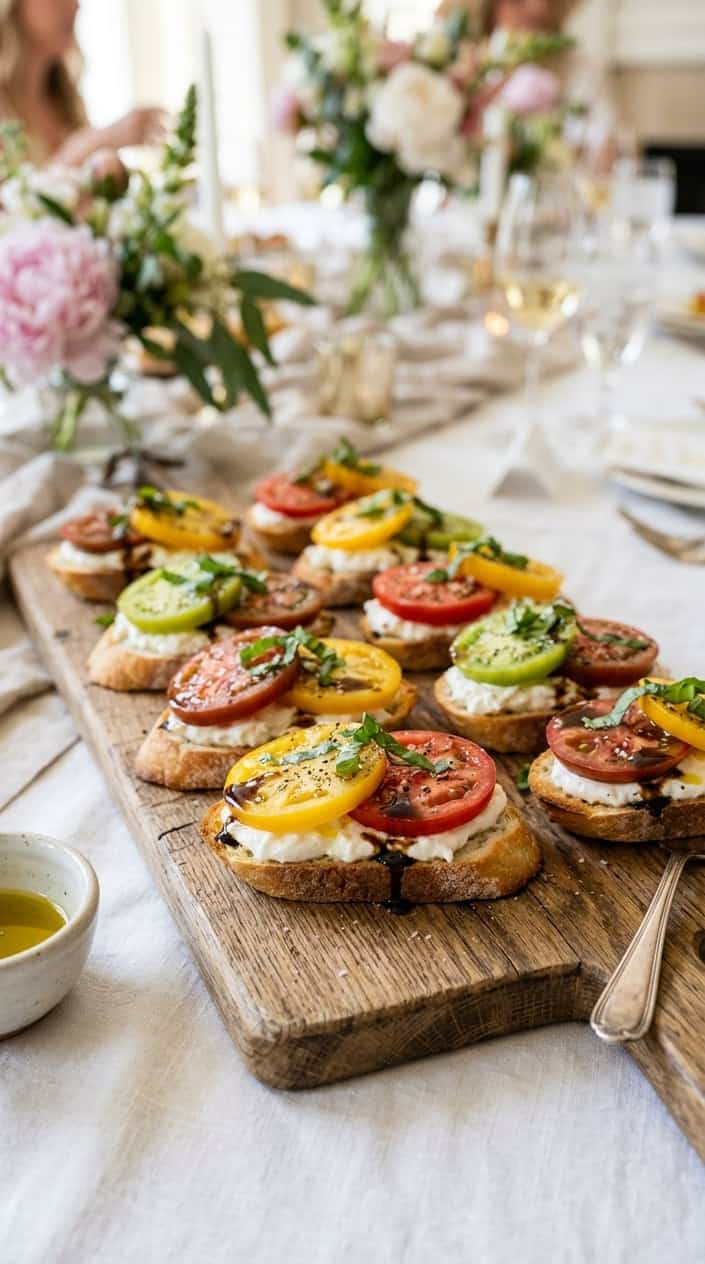
The key to crostini surviving a buffet is keeping the components separate until guests are ready to eat. Toasted bread holds its crispness far longer than softer bases, cool burrata keeps its shape until pulled apart, and a brief drain on the tomatoes prevents them from sogging the toast on contact.
Set the components out on separate platters and let guests assemble their own. This isn’t just a practical call — people genuinely enjoy building something small. It also buys you an extra thirty minutes of crispness compared to pre-assembled trays.
Free Wedding Planning Checklist
Stay organized from engagement to "I do" — get our comprehensive checklist covering every task, deadline, and detail.
Ingredients
- 1 baguette, sliced 1/2-inch thick
- 3 cups mixed heirloom tomatoes, quartered and drained
- 8 oz burrata (one large or several small balls)
- 1/4 cup fresh basil leaves, torn
- 2 tbsp extra-virgin olive oil
- 3 tbsp balsamic reduction
- Sea salt and cracked black pepper to taste
Instructions
- Preheat oven to 400°F. Brush both sides of baguette slices with olive oil and toast 6–8 minutes until golden and crisp.
- Arrange drained tomatoes in a bowl; season with salt, pepper, and a drizzle of olive oil.
- Tear burrata into pieces and keep chilled on a plate until ready to serve.
- Place toasted crostini on a serving board. Let guests top slices with burrata, tomato mixture, and basil.
- Finish each crostini with a light drizzle of balsamic reduction and a pinch of black pepper.
Prep time: 15 minutes | Cook time: 8 minutes | Servings: 12
At this point in the menu, you have your warm anchor dishes and your cold, crisp options covered. The next few recipes fill out the texture and temperature range — particularly for guests who prefer something plant-forward or a little heartier.
6) Maple-Roasted Root Vegetable Hash with Rosemary
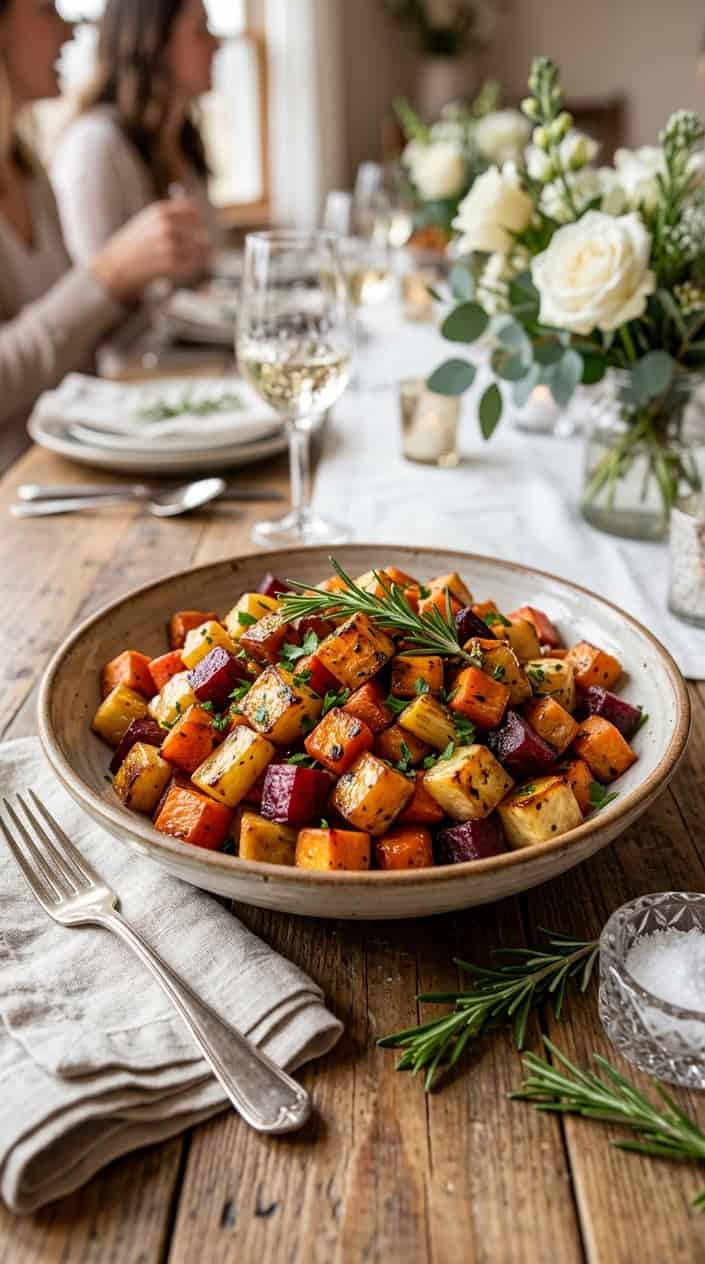
Root vegetables are an underrated buffet choice precisely because they resist falling apart. Dense carrots, parsnips, and sweet potatoes roasted at high heat develop caramelized edges that hold their texture for hours, which is more than you can say for zucchini or asparagus left on a warming tray.
The maple glaze is thin enough to caramelize rather than pool, so cubes come out with a slightly lacquered surface rather than a sticky coating. Keep this in a shallow chafing dish and stir it gently once midway through service to re-expose the caramelized edges that settle on the bottom.
Ingredients
- 2 lbs mixed root vegetables (carrots, parsnips, sweet potatoes), peeled and cut into 1/2-inch cubes
- 2 tbsp olive oil
- 2 tbsp pure maple syrup
- 1 tbsp fresh rosemary, finely chopped
- 1 tsp kosher salt
- 1/2 tsp black pepper
- 2 cloves garlic, minced
Instructions
- Preheat oven to 425°F. Line a rimmed sheet pan with foil.
- Toss cubed vegetables, olive oil, maple syrup, rosemary, salt, pepper, and garlic in a large bowl until evenly coated.
- Spread vegetables in a single layer, leaving space between pieces for airflow.
- Roast 25–30 minutes, stirring once at the 15-minute mark, until edges are caramelized and centers are tender but intact.
- Transfer to a shallow chafing pan and keep on low heat; stir gently every 20–30 minutes during service.
Prep time: 15 minutes | Cook time: 30 minutes | Servings: 8
7) Greek-Style Chickpea Salad with Lemon, Oregano, Feta, and Olives
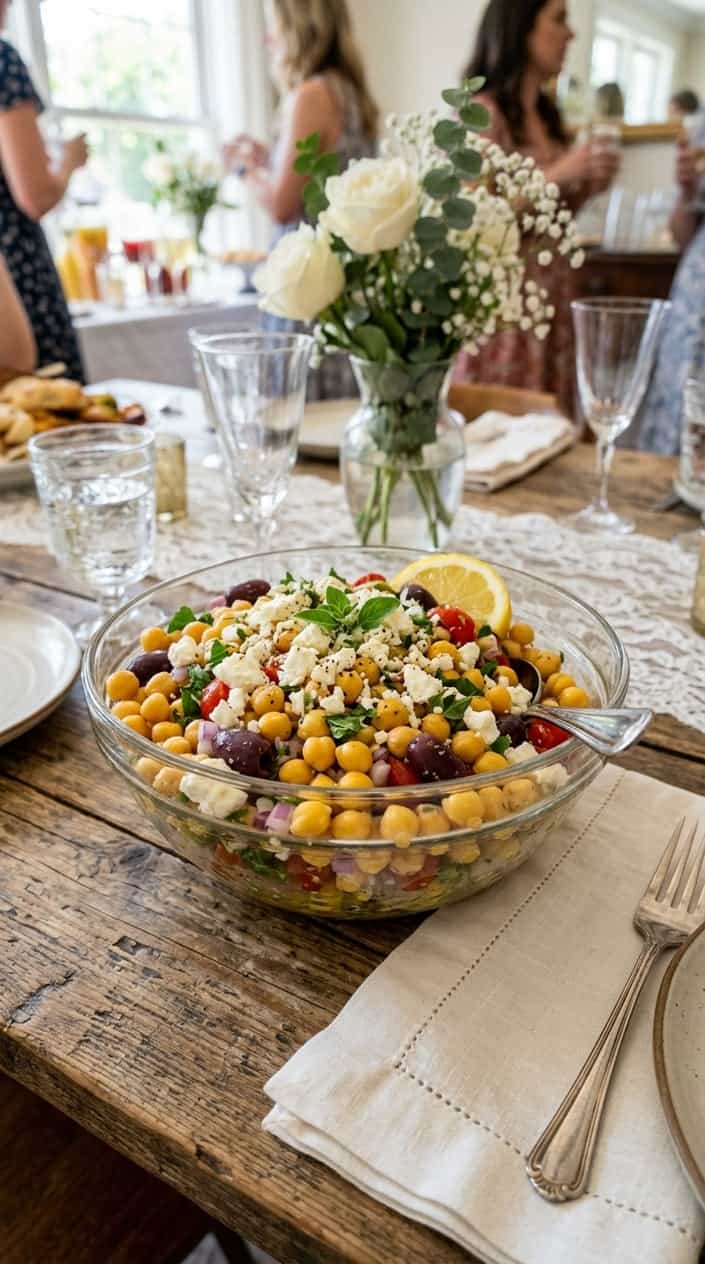
When I need a dish that requires zero reheating and zero fuss, this is the one. Chickpeas don’t weep, wilt, or change color after sitting out, which makes them genuinely useful in a way that leafy salads aren’t.
The lemon-oregano vinaigrette keeps its punch at room temperature, and the feta adds enough salt and fat to make the salad feel satisfying rather than like a side dish someone forgot to finish. A shallow serving bowl matters here — a deep bowl means guests are digging and crushing the ingredients at the bottom before anyone gets to them.
Ingredients
- 3 cups cooked chickpeas (or two 15-oz cans, drained and rinsed)
- 1 1/2 cups cherry tomatoes, halved
- 1 cup cucumber, diced (English cucumber preferred)
- 1/2 cup red onion, thinly sliced
- 3/4 cup feta, crumbled
- 1/2 cup Kalamata olives, pitted and halved
- 1/3 cup extra-virgin olive oil
- 3 tbsp fresh lemon juice
- 1 1/2 tsp dried oregano
- 1 small garlic clove, minced
- 1/2 tsp salt and 1/4 tsp black pepper
Instructions
- Combine chickpeas, tomatoes, cucumber, red onion, olives, and feta in a large bowl.
- Whisk olive oil, lemon juice, oregano, garlic, salt, and pepper until emulsified.
- Pour dressing over salad and toss gently to coat without crushing ingredients.
- Let sit 15 minutes at room temperature so flavors come together, then taste and adjust salt.
- Transfer to a shallow serving dish and garnish with a few whole olives or an extra pinch of oregano.
Prep time: 15 minutes | Cook time: 0 minutes | Servings: 8
8) Honey-Lavender Scones with Clotted Cream
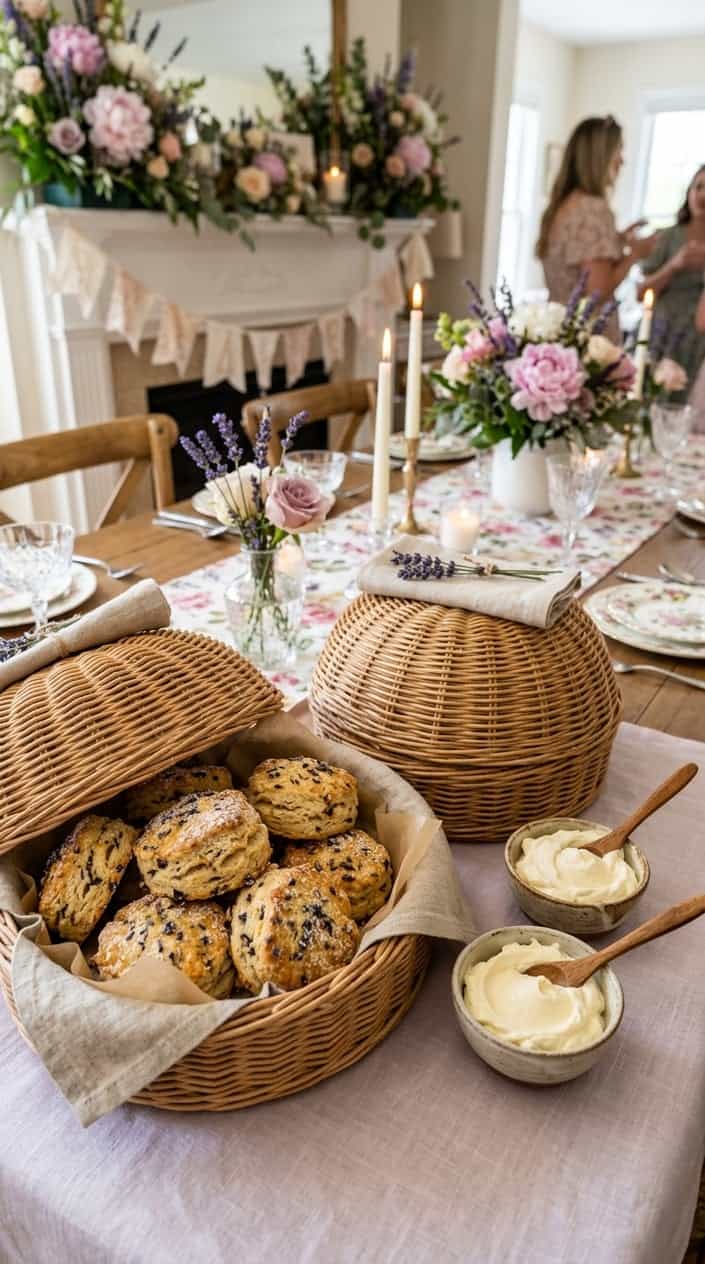
Scones have a reputation for going stale fast, and that reputation is earned — if you store them wrong. The issue is usually steam. A sealed container traps moisture and softens the crust. A shallow basket lined with parchment, covered loosely with a clean tea towel, lets them breathe without drying out.
The honey-lavender combination is well-suited to a bridal shower because the flavors are distinct without being polarizing. Culinary lavender is softer than it sounds when balanced against honey and lemon zest. Keep the clotted cream in a separate dish at room temperature and let guests spoon it on themselves — that’s the one component that shouldn’t sit on the scone in advance.
Ingredients
- 2 1/2 cups all-purpose flour
- 1/4 cup granulated sugar
- 2 tsp baking powder
- 1/2 tsp salt
- 1 tbsp culinary lavender, finely chopped
- 8 tbsp cold unsalted butter, cubed
- 1/2 cup clotted cream (for serving)
- 1/2 cup heavy cream
- 1/3 cup honey
- 1 large egg
- Zest of 1 lemon
Instructions
- Preheat oven to 400°F. Whisk flour, sugar, baking powder, salt, and lavender in a bowl.
- Rub in cold butter with fingertips until the mixture resembles coarse crumbs.
- Whisk cream, honey, egg, and lemon zest together; fold into dry mix until just combined.
- Turn dough onto a floured surface, pat into an 8-inch circle, and cut into 8 wedges.
- Place wedges on a lined baking sheet an inch apart; brush tops with a little heavy cream.
- Bake 14–16 minutes until light golden. Cool on a rack for 10 minutes.
- Transfer to shallow baskets lined with parchment; cover loosely with a clean towel until service.
- Serve clotted cream at room temperature; let guests spoon it on just before eating.
Prep time: 20 minutes | Cook time: 15 minutes | Servings: 8
9) Smoked Brisket Sliders with Pickled Red Onion and Horseradish Aioli
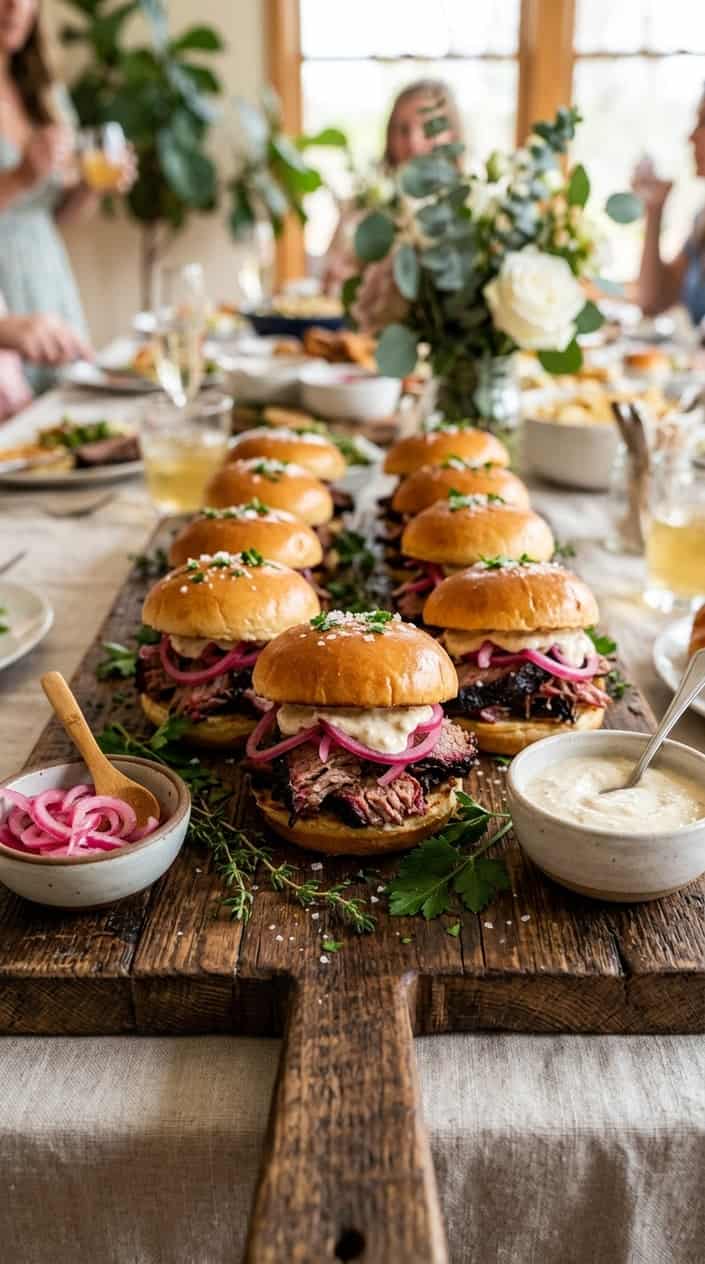
Fatty, shredded brisket is one of the most forgiving proteins you can put on a buffet. The connective tissue that breaks down during a long smoke keeps the meat moist even as it sits, unlike leaner cuts that tighten and dry out within an hour of leaving the heat.
The quick-pickled red onion does double duty: it adds acidity that cuts through the richness, and the vivid pink color makes the slider tray look fresh even late in the service. One practical note — keep the horseradish aioli on the side and close the sliders just before guests grab them. Pre-sauced buns go soft fast, and that’s an easy problem to avoid.
Ingredients
- 3 lb smoked beef brisket, sliced or pulled
- 12 slider rolls (King’s Hawaiian-style)
- 1 cup quick-pickled red onion
- 1/2 cup horseradish aioli
- 2 tbsp unsalted butter, melted
- 1 tsp smoked paprika
- Salt and pepper to taste
Instructions
- Reheat brisket in a covered pan at 250°F for 30–40 minutes, adding 1/4 cup beef broth to keep moisture.
- Toss warmed brisket with smoked paprika, salt, and pepper; hold in an insulated carrier or steam table pan.
- Brush rolls with melted butter and warm for 5 minutes in a 350°F oven.
- Layer brisket on bottom buns, spoon on pickled red onion, and pass aioli on the side.
- Close sliders just before serving to preserve texture.
Prep time: 15 minutes | Cook time: 40 minutes | Servings: 12
The USDA recommends keeping hot buffet foods at or above 140°F and cold foods at or below 40°F. For a two-hour brunch service, that means insulated carriers for hot dishes and a bed of crushed ice under cold platters — not just a pretty linen underneath. It’s a practical detail that also happens to protect your guests.
Nine dishes is enough to build a real menu with range: warm, cold, savory, sweet, one for the meat-eaters, one for the plant-forward guests, something indulgent, and something light. The thread connecting all of them isn’t a theme or a color palette — it’s the simple fact that none of them fall apart when a guest circles back for seconds at 12:15.
That’s the real measure of a well-planned brunch buffet: not how it looks in the first ten minutes, but how much of it is still worth eating an hour later.